Every now and then I go on a baking binge. I figure it's a little healthier than other types of binges. :) And every now and then, that baking binge has a purpose. I needed to make some goodies to give to my co-workers for Christmas and also have something to eat at my birthday party, and cookies sounded like the perfect thing.
This post will include three recipes, but unfortunately no pictures. :( In my excitement (and haste) in baking, I forgot to photograph the event. You'll just have to use your imagination for these. :)
The first recipe came from my Nana. She sent me a letter with this recipe included, and it really worked well. I always think of sugar cookies around the holiday season, but rarely have time to chill the dough and don't really have the space for rolling out dough. This recipe negates both those obstacles, which makes it one of my new standbys.
Reader's Digest Sugar Cookies
Ingredients:
2 3/4 c. flour
1 tsp. baking soda
1/2 tsp. baking powder
1 c. oleo
1 1/2 c. sugar
1 egg
1 tsp. vanilla
Directions:
Preheat oven to 375 degrees. Beat oleo, sugar, egg, and vanilla together. Combine dry ingredients, then add to wet mixture. Form in to balls and place on ungreased cookie sheets. Dip in sprinkles if desired. Bake for 8-10 minutes and cool on wire racks. Frost, if desired, when completely cooled.
The next recipe comes from a cookbook that the Carl Albert Center put together a few years ago for a holiday cookie exchange. This recipe was contributed by my friend and co-worker at that time, Kate Cornwell. I had not tried it before this endeavor, but I have made snickerdoodles before. This recipe was pretty good. I think the cookies turned out differently than when I have made them in the past because I grew up using margarine rather than butter for baking and this time I used butter. The cookies do flatten out with butter, but they are still delicious.
Snickerdoodles
Ingredients:
1/2 c. butter, softened
1 c. sugar
1/4 tsp. baking soda
1/4 tsp. cream of tarter
1 large egg
1/2 tsp. vanilla
1 1/2 c. flour
4 T. sugar
1 1/2 tsp. cinnamon
Directions:
Preheat oven to 375 degrees. In a mixing bowl, beat the butter on medium speed for 30 seconds. Add 1 cup sugar, baking soda, and cream of tarter. Beat until combined, scraping sides of bowl occasionally. Beat in the egg and vanilla until blended. Beat in as much flour as possible with the mixer and stir in remaining flour. Cover with plastic wrap and chill for 1 hour.
Combine the 4 tablespoons sugar and the cinnamon in a shallow bowl. Shape the dough into 1-inch balls and roll in the cinnamon-sugar mixture. Place dough balls on ungreased cookie sheet and bake for 10 to 11 minutes or until edges are golden. transfer cookies to wire rack to cool.
The final recipe is a new one I just encountered earlier in the month. I get the Food Network newsletter in my email, and they were doing the 12 Days of Cookies. This recipe is the first one they featured. It's by Paula Deen, so of course it has butter in it. :) If you would like the original recipe, you can find it here.
These cookies were pretty delicious! I also tried a variation, making these cookies gluten-free. I have a couple GF co-workers and did not want them to be left out of the goodness, and this is a good recipe to make GF.
Chocolate Gooey Butter Cookies
Ingredients:
1 8 oz. pack cream cheese, room temperature
1 stick butter, room temperature
1 egg
1 tsp. vanilla
1 18 oz. box chocolate cake mix (or gluten-free cake mix)
Confectioners' sugar for dusting
Directions:
In a large bowl with an electric mixer, cream the cream cheese and butter together until smooth. Beat in the egg, then add in the vanilla and beat until combined. Beat in the cake mix until well blended. Cover and chill the dough for 2 hours.
Roll the dough into balls and then roll them in confectioners' sugar. Place on an ungreased cookie sheet and bake at 350 degrees for 12 minutes. The cookies will be soft. Cool completely and sprinkle with more confectioner's sugar, if desired.
Friday, December 31, 2010
Kitchen Adventures 7.3
Sometimes, there's nothing better than a good burger. I know it's not quite the time of year when most people think of making burgers since it's a little chilly for breaking out the grill (or at least it is today!) and tailgating season has ended, but I found a good variation that doesn't need a grill. This is good, since I don't have one. :)
I like this recipe because it jazzes up your traditional hamburger and does things a little differently. For one, it includes cheese, but not how you would think it does. This is not your typical cheeseburger that slaps a skinny piece of American cheese on top of a patty. No no, this one sticks the cheese INSIDE the burger and uses blue cheese. Pretty neat, huh? I liked it at least. Now, if you are not a blue cheese fan, then this recipe is probably not for you. The blue cheese is pretty prominent in every bite, so just be aware.
This recipe came from one of my Every Day with Rachael Ray magazines.
Inside-Out Cheeseburger
Ingredients:
1/4 c. crumbled blue cheese (2-3 oz.)
2 oz. cream cheese
2 T. chopped flat leaf parsley
1 1/2 lbs. ground beef
salt and pepper
2 T. vegetable oil (I used olive oil)
2 T. butter
4 hamburger buns, split and toasted
Toppings of your choice
Directions:
In a small bowl, mash the blue cheese and cream cheese together until smooth. Stir in the parsley (I used dry parsley, so if you do this remember to use less than the recipe calls for.) Divide the mixture into 4 disks and cover tightly with plastic wrap and refrigerate for at least 20 minutes.
In a large bowl, season the beef with salt and pepper and mix well. (I like to add in a little Italian seasoning as well.)Form into 4 equally sized patties. Form a deep cavity in the center of each meat patty and place a cheese disk inside. Pull the meat together to completely cover the cheese disk. Make sure to do this or the cheese will leak out.
In a large skillet, heat the oil and butter over medium-high heat. Add the burgers and cook, about 4 minutes on each side. Serve on the buns with your choice of toppings. *Note: make sure to use enough meat. I only used 1 lb. and the cheese ended up leaking out since there wasn't enough meat to keep it sealed up. Still, it was delicious.
Here are a few pics:


Kitchen Adventures 7.2
I love a good bread recipe. I also love a good pumpkin recipe. So, naturally, I love a good pumpkin bread recipe. I fondly remember coming home from school and smelling freshly baked pumpkin bread when it got to be the later months of the year. My mom uses a great pumpkin bread recipe, and her pumpkin roll recipe is even better. However, I found another pumpkin bread recipe that I just had to try for sentimental reasons.
Last year, Alex and I helped a couple from McFarlin UMC here in Norman prepare an exhibit that is now on display at the church. They had existing pictures that they needed at different sizes, and they also needed a recent picture of the church. We helped them with this project and got to know them a little bit through this process. Then, a few months later, I learned that Mary, the lady who put this all together, had passed away. It was saddening since we had just finished working on this project with her. Shortly after that, I was at the annual cookbook swap and shop at the Norman Public Library and came across a gem, The University Cookbook. I saw it and hoped I would have enough money or tickets to get it and that it would be left at the end of the day. As my friend Shaye and I were looking at it, the organizer of the event, Judy Day, came over and raved about the cookbook. It was published by the University Women's Association at OU so included lots of recipes from professors or professors' wives. The recipe Judy flipped to was Mary's pumpkin bread. Well, when I saw that I got it immediately.
I finally got to make this recipe a few weeks ago, and I thought of Mary while the bread was baking. The note she left at the bottom of the recipe was appropriate for the moment, so I'll share it here.
"A nice way to be remembered often is to pass on a favorite recipe to a friend. This is how I got this all-time favorite pumpkin bread recipe. Even though the friend has moved far away, I think of her every time I make it."
That is one thing I hope for as I share all the recipes I make. I love sharing my creations with those nearby, but if I can't share the food I can share the recipe with those far away. I hope you enjoy this one! As a note, it does have a longer baking time, so plan appropriately.
Pumpkin Bread
Submitted by Mary Rodgers to The University Cookbook
Ingredients:
3 eggs, beaten
1 c. vegetable oil
3 c. sugar
2 tsp. vanilla
2 c. canned pumpkin
3 c. flour
1 tsp. allspice
1 tsp. cinnamon
1 tsp. cloves
1 tsp. nutmeg
1 tsp. baking powder
1/2 tsp. soda
1/2 tsp. salt
1 c. nut pieces (optional)
Directions:
Mix together eggs, oil, sugar, and vanilla. Sift dry ingredients together, and add nut pieces if desired. Add dry ingredients to wet mixture and stir well. Finally, add the pumpkin and mix well. Bake at 250 degrees for 2-2 1/2 hours in two medium size loaf pans that are lightly greased and floured.
Here are a couple pics:


Kitchen Adventures 7.1
Oh my, I am so far behind! I didn't realize it's been over a month since I shared my kitchen creations. December was a busy month, to say the least. It started off with Harry Potter and the Big 12 championship game with friends, the next weekend held the Eilert family Christmas up in Kansas City (36 in attendance, not too shabby!), then I got sick immediately after coming back home. :/ Those couple days really threw me for a loop and delayed all my baking endeavors. It even meant I missed my own monthly birthday party at work. :( I recovered in time for a small birthday gathering and church things, then it was time to head up to Kansas for Christmas. And there went the month! Time at home was wonderful, getting to see all my family and some friends. It's never a long enough visit it seems, no matter how long it is. But with all that being said, that is the long excuse for not updating sooner. I'll amend that right now, though, with a succession of posts to catch up before 2010 comes to a close.
This first recipe is one I have turned to over the past few winters as my chili standby recipe. Now, I know everyone is very particular about their chili and has their favorite recipe. This is an easy one that I like, and I will admit, this last batch was not the best. It showed me the importance of having a good chili seasoning mix, because Target does not carry the brand I would normally get. It did get better the second time around, though, which is good.
This particular chili recipe comes from a cookbook I got for Christmas several years ago. It's called Rival Crock Pot 3 Books in 1 and includes "Slow Cooker Favorites," "Winning Slow Cooker Recipes," and "Slow Cooker Recipes for All Occasions." This one comes from the "Slow Cooker Favorites" section and is pretty darn delicious, if I do say so myself. Enjoy!
McCormick's Weeknight Chili
Ingredients:
1 lb. ground beef or ground turkey
2 8 oz. cans tomato sauce
1 15 oz can red kidney beans, undrained
1 pkg. chili seasoning (of course they use McCormick's but you can use whatever you like)
1 c. shredded cheddar cheese
Directions:
Cook meat in a skillet until brown, then drain. Transfer meat to your slow cooker and stir in tomato sauce, beans, and seasoning. Cover and cook on low for 1 to 2 hours or on high for 45 minutes to 1 hour. Stir before serving and top with cheese. * I always end up cooking mine on high because I just can't wait or don't have enough time. :)
Here are a few pics:


Sunday, November 21, 2010
Kitchen Adventures 6.4
As a librarian, one of my favorite things to do is share knowledge and information. With the social media we have today, this sharing is made even easier. Sometimes, since we are so connected all the time, we can get bombarded with information, which can lead to information overload. At times, when I'm searching for a recipe online, I feel this way. One way we overcome this information overload is by turning to trusted sources, namely people we see as authorities on a subject. For instance, I will turn to my friends that know about computers before checking another source. We like going to a person more than a remote source, generally speaking.
Another way to cut through this overload it to use recipes (or information) people specifically send you because they know you are interested in a subject. Over the past week I have had two people send me recipes, which I love! (If you have a favorite, send it my way!) I received a letter from my Nana with a sugar cookie recipe in it, which I will definitely be using soon. The other was this recipe, which my friend Tara saw on a blog and shared with me via Facebook. That is one of the perks of our social networks, sharing information so easily. She shared the link with me, I checked out the blog and copied the recipe into a Word document and saved it, then I'll copy it from that document into this blog post. The ease of sharing this information makes me more likely to share information because it IS so easy to do. Yay for social networks (in this instance)! also, here is a link to the original blog post: Brown-Eyed Baker
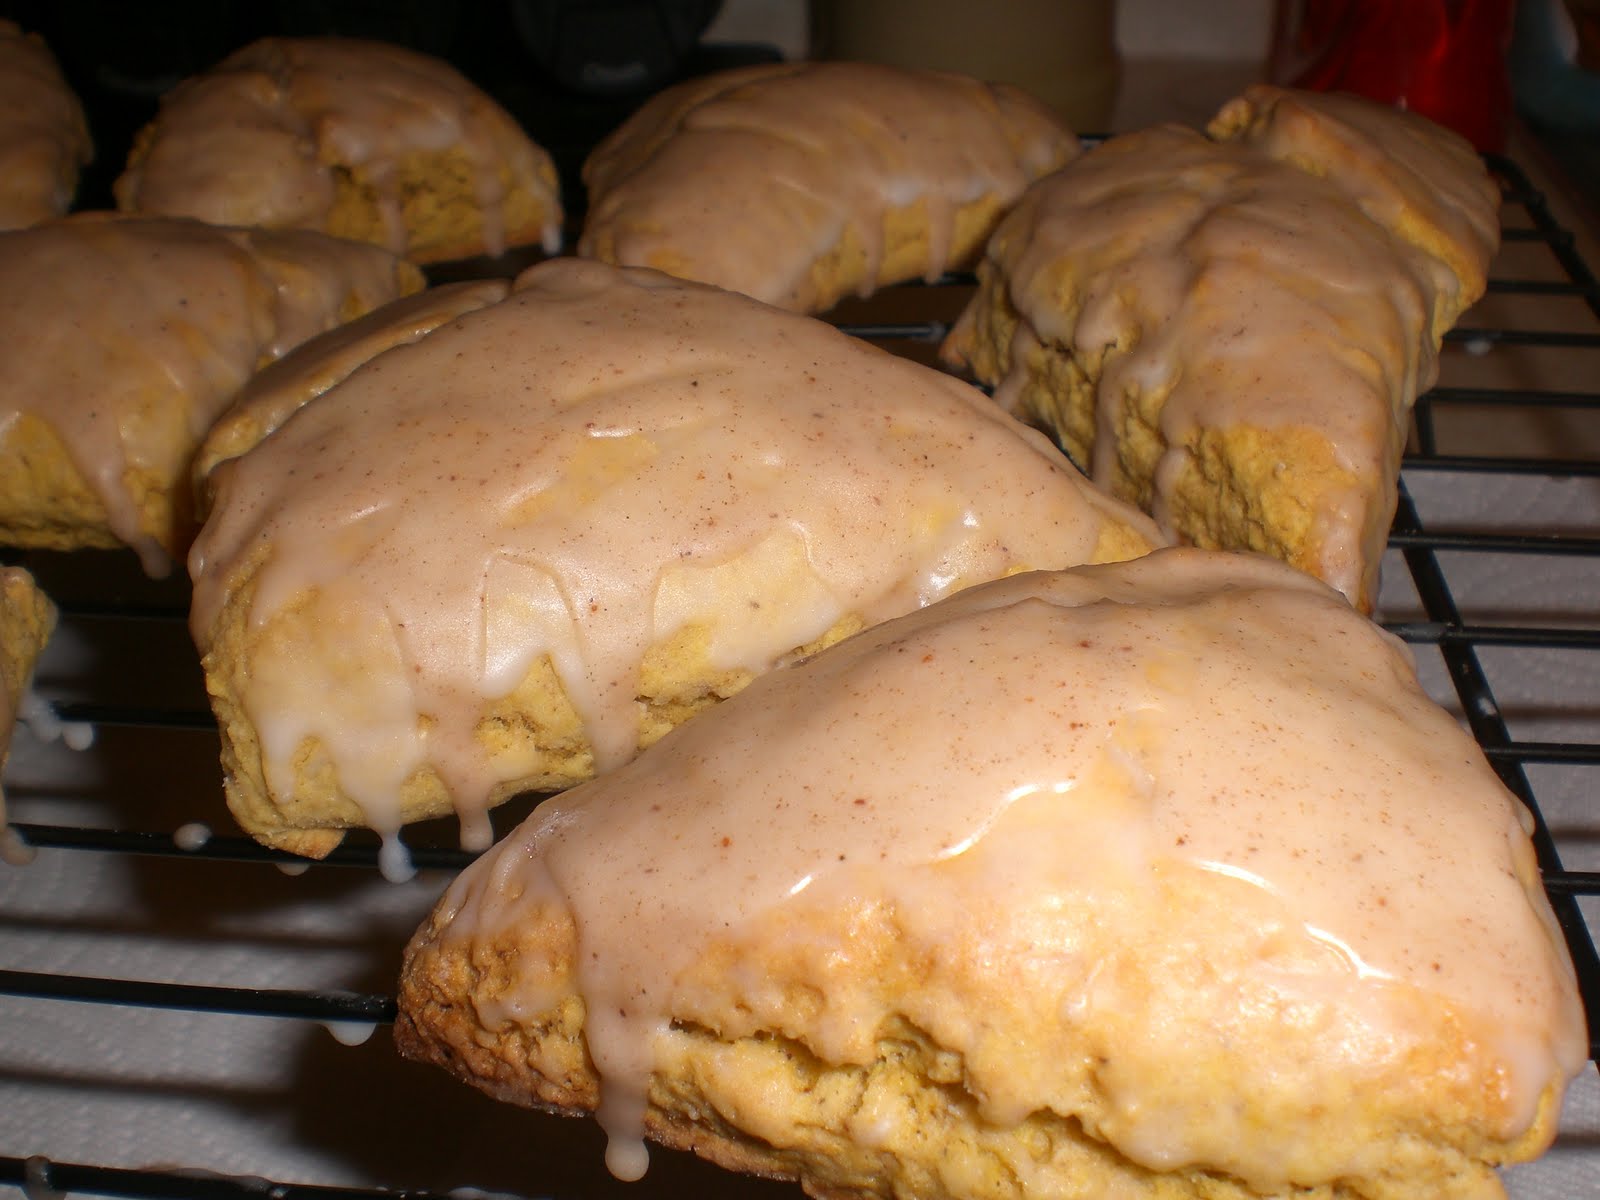
This was a pretty quick recipe to make, and they cooled quick enough for me to get them completely finished within two hours, which is pretty good for me when I'm making a recipe for the first time. Since they are scones they are fairly dense, but the icing and glaze on top add just enough sweetness to make all the chewing enjoyable. These are a great fall treat for sure! Thanks again, Tara, for sharing this with me!
Pumpkin Scones with Spiced Glaze
Yield: 12 scones
Ingredients:
For the Scones:
2 cups all-purpose flour
7 Tablespoons granulated sugar
1 Tablespoon baking powder
1/2 teaspoon salt
1/2 teaspoon ground cinnamon
1/2 teaspoon ground nutmeg
1/4 teaspoon ground cloves
1/4 teaspoon ground ginger
6 Tablespoons cold butter
1/2 cup canned pumpkin
3 Tablespoons half-and-half
1 large egg
For the Powdered Sugar Glaze:
1 cup plus 1 Tablespoon powdered sugar
2 Tablespoons milk
For the Spiced Glaze:
1 cup plus 3 Tablespoons powdered sugar
2 Tablespoons milk
1/4 teaspoon ground cinnamon
1/8 teaspoon ground nutmeg
1 pinch ground ginger
1 pinch ground cloves
Directions:
1. Preheat the oven to 425 degrees F. Line a baking sheet with parchment paper; set aside. (I just sprayed the baking sheet with cooking spray.)
2. Combine flour, sugar, baking powder, salt, cinnamon, nutmeg, cloves and ginger in a large bowl. Use a fork or pastry cutter to cut the butter into the dry ingredients until mixture is crumbly and no chunks of butter are obvious; set aside.
3. In a separate bowl, whisk together the pumpkin, half-and-half and egg. Fold wet ingredients into dry ingredients, and form the dough into a ball. Pat out dough onto a lightly floured surface and form it into a 1-inch thick rectangle about 3 times as long as wide. Use a large knife or a pizza cutter to slice the dough twice through the width, making three equal portions. Cut each of the portions in an X pattern (four pieces) so you end up with 12 triangular slices of dough. Place on prepared baking sheet. Bake for 14-16 minutes, or until light brown. Place on wire rack to cool.
4. To make the powdered sugar glaze, mix the powdered sugar and milk together until smooth. When scones are cool, use a brush to spread plain glaze over the top of each scone. (I did two coats.)
5. To make the spiced glaze, while the powdered sugar glaze is firming, combine all of the ingredients for the spiced glaze. Drizzle over each scone and allow the icing to dry before serving (about an hour). (I ended up using the leftover regular powdered sugar glaze and adding 1 c. powdered sugar and about 1 T. milk along with the spices.)


Another way to cut through this overload it to use recipes (or information) people specifically send you because they know you are interested in a subject. Over the past week I have had two people send me recipes, which I love! (If you have a favorite, send it my way!) I received a letter from my Nana with a sugar cookie recipe in it, which I will definitely be using soon. The other was this recipe, which my friend Tara saw on a blog and shared with me via Facebook. That is one of the perks of our social networks, sharing information so easily. She shared the link with me, I checked out the blog and copied the recipe into a Word document and saved it, then I'll copy it from that document into this blog post. The ease of sharing this information makes me more likely to share information because it IS so easy to do. Yay for social networks (in this instance)! also, here is a link to the original blog post: Brown-Eyed Baker
This was a pretty quick recipe to make, and they cooled quick enough for me to get them completely finished within two hours, which is pretty good for me when I'm making a recipe for the first time. Since they are scones they are fairly dense, but the icing and glaze on top add just enough sweetness to make all the chewing enjoyable. These are a great fall treat for sure! Thanks again, Tara, for sharing this with me!
Pumpkin Scones with Spiced Glaze
Yield: 12 scones
Ingredients:
For the Scones:
2 cups all-purpose flour
7 Tablespoons granulated sugar
1 Tablespoon baking powder
1/2 teaspoon salt
1/2 teaspoon ground cinnamon
1/2 teaspoon ground nutmeg
1/4 teaspoon ground cloves
1/4 teaspoon ground ginger
6 Tablespoons cold butter
1/2 cup canned pumpkin
3 Tablespoons half-and-half
1 large egg
For the Powdered Sugar Glaze:
1 cup plus 1 Tablespoon powdered sugar
2 Tablespoons milk
For the Spiced Glaze:
1 cup plus 3 Tablespoons powdered sugar
2 Tablespoons milk
1/4 teaspoon ground cinnamon
1/8 teaspoon ground nutmeg
1 pinch ground ginger
1 pinch ground cloves
Directions:
1. Preheat the oven to 425 degrees F. Line a baking sheet with parchment paper; set aside. (I just sprayed the baking sheet with cooking spray.)
2. Combine flour, sugar, baking powder, salt, cinnamon, nutmeg, cloves and ginger in a large bowl. Use a fork or pastry cutter to cut the butter into the dry ingredients until mixture is crumbly and no chunks of butter are obvious; set aside.
3. In a separate bowl, whisk together the pumpkin, half-and-half and egg. Fold wet ingredients into dry ingredients, and form the dough into a ball. Pat out dough onto a lightly floured surface and form it into a 1-inch thick rectangle about 3 times as long as wide. Use a large knife or a pizza cutter to slice the dough twice through the width, making three equal portions. Cut each of the portions in an X pattern (four pieces) so you end up with 12 triangular slices of dough. Place on prepared baking sheet. Bake for 14-16 minutes, or until light brown. Place on wire rack to cool.
4. To make the powdered sugar glaze, mix the powdered sugar and milk together until smooth. When scones are cool, use a brush to spread plain glaze over the top of each scone. (I did two coats.)
5. To make the spiced glaze, while the powdered sugar glaze is firming, combine all of the ingredients for the spiced glaze. Drizzle over each scone and allow the icing to dry before serving (about an hour). (I ended up using the leftover regular powdered sugar glaze and adding 1 c. powdered sugar and about 1 T. milk along with the spices.)

Kitchen Adventures 6.3
If I've said ti once, I've said it a thousand times: some of the best recipes you can find come from church cookbooks. One of my favorite cookbooks is from my youth group fundraiser years ago. Each year we took a mission trip, usually to a GROUP workcamp or local mission. I had wonderful opportunities to serve people in South Dakota (twice!), New Mexico, Oklahoma, Minnesota, Colorado, and Tennessee. For each trip we did several fundraisers, and one year this cookbook was a big one for us. What makes this cookbook different from your regular church cookbook is that we had several different people to draw from as our youth group was actually three churches combined along with several others that attended different churches, so we had quite a variety of recipes. I always check this first if I'm looking for a good recipe. Thanks, Mom, for getting this for me! This recipe was contributed by Kim Hsgue, one of my mom's good friends. Thanks, Kim!
I had to amend one of the key ingredients in this recipe as I could not find it at the store. luckily, my friend Shaye, aka my grocery shopping buddy, suggested a good alternate. I could not find a loaf of frozen bread at Target, so instead I used a refrigerated pizza crust. It was not one of the circle ones but one you roll out. This worked pretty well for what I needed to do, and it took much less time as i did not have to wait for the bread to rise. If you choose to use a pizza crust instead, make sure you cook it according to the pizza cooking directions, not necessarily the recipe cooking times and temperatures. You could also add whatever you want inside, but I liked the original ingredients so did not change them.
Stromboli
Ingredients:
1 loaf Rhodes frozen bread (or pizza crust)
ham
hard salami
provolone cheese
garlic powder
Italian seasoning
1 egg yolk
Parmesan cheese
Directions:
Let bread defrost and rise on cookie sheet. Roll out around the cookie sheet. Layer ham, salami, and provolone cheese. Sprinkle on garlic powder and Italian seasoning, to taste. Roll up jelly-roll style and seal all edges. Brush on egg yolk and sprinkle with Parmesan cheese. Bake at 375 degrees for 25-30 minutes.

Kitchen Adventures 6.2
I have quite a bit of catching up to do on here! The last week or so has been incredibly crazy, to put it mildly. I've been busy at work, dealing with lots of little issues there, and then finding way too many things to do with my free time. But, hanging out with my friends doing things like celebrating jobs, hitting up the monthly art walk, going to football games and out to dinner, church things, and random shopping trips make my life that much better.
All those fun things, though, keep me away from posting more frequently. For instance, this is a recipe I made about three weeks ago and just never found time to post after making it.
This is the perfect recipe for a chilly fall evening, which to me is soup weather. It also freezes decently well, and I just finished it off this week by sharing with a few friends for dinner one night. I got this one from a binder my Aunt Kathie gave me a couple Christmases ago. She had it at Thanksgiving and showed everyone and I just had to have a copy. I'm not sure where she got the recipes, but if anyone wanted the source for this one I could ask. It's a good one for sure!
A couple notes I learned the first time I made this that made this go-round much better. First, make sure you chop your potatoes to a fairly standard size, that way the chunks cook the same amount. Second, make sure you have the potatoes chopped, onions chopped, and bacon cooked and crumbled before starting the flour and butter. You will not have enough hands to chop, stir, and crumble all at the same time! Finally, you will have to stir for awhile to get the milk to thicken. I probably could have stirred it a little bit more, but it turned out fine.
Baked Potato Soup
Ingredients:
2/3 c. butter or margarine
4 sliced green onions (I omitted these)
1 c. sour cream
1 1/4 c. shredded cheddar cheese (I used a little more)
7 c. milk
12 cooked, crumbled bacon strips
2/3 c. flour
4 lg. baking potatoes OR hash browns (I used potatoes)
Directions:
Chop potatoes and onions and cook bacon. In a large soup kettle or dutch oven, melt the butter. Add in flour, heat and stir until smooth. Gradually add milk, stirring constantly until thickened. Add potatoes and onions. Bring to a boil, stirring constantly. Reduce heat and simmer for 10 minutes. Add remaining ingredients, stir until cheese is melted.


Friday, November 12, 2010
Kitchen Adventures 6.1
I can't believe it's been six months since I started posting my recipes and sharing how food ties into my life! I recently looked back at all of them, and there were almost thirty recipes! I've been a busy baker! Coincidentally, my maternal grandmother's maiden name was Baker. Ironic, no? :)
This post's entry is courtesy of the Carl Albert Center bake-off contest. This contest has been going on for the past six weeks or so between people in the Archives office. I was an honorary member as I used to be a student worker and GA there. And, conveniently for me, I just moved up a floor so I can easily participate. Everyone has contributed some wonderful baked goods. I'm sure they are ready for me to stop popping in to see if they have food for me, but the contest is almost up, so no worries there.
This is a recipe I got from a friend from college. I saw that she had posted a status update on Facebook regarding this delicious-sounding recipe, and I mentioned how good they sounded. Well, she sent it to me! I'm very grateful for that, and that small move pretty much made my day when I received it. I love getting recipes that other people love as it gives it a bit more credence in my mind. The only stipulation was that I change the recipe just a bit from the original wording and credit it to the proper person, which I can totally do. I received the recipe from Danielle Leivian and she received it from another blog. My switch is the muffin size--originally it was mini muffins, but with no mini muffin pan I made regular-size muffins. Also, I used a new silicone pan I got from an estate sale for one batch and a regular metal pan for another. I also ended up being 1/4 c. short on molasses sadly, but forgot to add in more liquids to compensate for that with the first batch I baked. The second ones were a little better as I had added a bit more milk. Leaving out part of the molasses works if you are making them for people that are not big fans of gingerbread as it makes it a little less overpowering.
Gingerbread Muffins
Ingredients:
1 c. dark brown sugar
2 1/2 c. flour
1 1/2 tsp. baking soda
1 tsp cinnamon
1 tsp ground ginger
1/2 tsp. salt
1/4 tsp nutmeg (you could use closer to 1/2 if you prefer)
1 egg
1/2 c. of molasses
1 c. buttermilk (or add 1 T. vinegar to 1 c. milk and let sit for 10 minutes)
1/2 c. melted butter.
Directions:
1. Preheat the oven to 350 degrees.
2. Mix the dry ingredients in one larger bowl.
3. Mix wet ingredients in a smaller bowl.
4. Add wet ingredients to dry ingredients and stir until just blended.
5. Spray each muffin cup and fill 3/4 full with batter.
6 Bake for 15 minutes or until toothpick comes out clean.
I liked these, but I think I need to make them again with the proper amount of molasses. Still tasty, though!

Saturday, November 6, 2010
Kitchen Adventures 5.4
Each year we always have some type of fruit to harvest in the orchard back home. I love picking fruit, but I rarely ever eat anything I pick. This year, though, we had a bountiful crop of apples and pears, and they were actually tasty. Sometimes it's just not a good fruit year, but the conditions were right for our trees this year I guess.
While I was home for Karen's wedding I took a break from wedding festivities to pick some apples and pears to bring back with me. I ended up with waaay more fruit than I needed, especially since I'm not a big pear fan. I gave quite a bit away, but I still had some left. After discovering Food Gawker from the girls at work, I decided to see if I could find a good pear recipe. I ended up looking at several blogs from different countries, which was a neat experience. My final selection was a pretty scrumptious pear tart. I had never made a tart or cooked with pears before, so i did not quite know how it would turn out. It was a little work (peeling pears takes time), but it was worth it in the end.
This recipe came from a blog I found through Food Gawker. Here is a link to the website: jun-blog.
Making a Farm Wife’s Fresh Pear Tart *adapted from Marcella Hazan’s Essentials of Classic Italian Cooking
Ingredients:
2 eggs
1/4 c. milk
1 c. sugar
salt
1 1/2 c. flour
2 pounds fresh pears
butter for greasing the pan and dotting the cake
1/2 c. dry, unflavored bread crumbs
1 dozen cloves, optional (I did not use these)
Directions:
1. Preheat the oven to 375 degrees
2. Beat the eggs and milk together in a bowl. Add the sugar and a tiny pinch of salt, and continue to beat. Add the flour, mixing it in thoroughly to produce a compact cake batter.
3. Peel the pears, cut them lengthwise in two, scoop out the seeds and core, then cut them into thin slices about 1 inch wide, Add them to the batter in the bowl, distributing them evenly.
4. Smear a 9-inch cake pan generously with butter, sprinkle lightly with bread crumbs, then turn the pan over and give it a sharp rap against the counter to shake loose excess crumbs.
5. Put the batter into the pan, leveling it off with the back of a spoon or a spatula. Make numerous small hollows on top with a fingertip and fill them with little bits of butter. Stud with the optional cloves, distributing them at random, but apart. Place the pan in the upper third of the preheated oven and bake for 50 minutes, or until the top has become lightly colored.
What I liked about this was that the fruit did not turn mushy. It may have been the type of pears I used, but they stayed fairly crisp after baking. It is delicious slightly warm, but also good at room temperature.

Kitchen Adventures 5.3
I don't feel like I did much cooking or baking in October, possibly because I was at home two weekends and running around like crazy the rest of the month. However, at the end of the month I had several baking opportunities, which made me happy. :)
The first opportunity was our monthly birthday party at work. Each month we celebrate everyone that has a birthday with one party.. We barely fit it in this month with craziness at the end of the month, but we did squeak it in. I try to ask our birthday honorees what they want each month since there is no point in me making something that they won't even like.
This month's contribution came from one of our best student workers. We had been talking about pumpkin custard from Rusty's and she said she had never had pumpkin pie before. She is from an Asian-American family, so even though they have turkey at Thanksgiving, most of the rest of the food is traditional Asian dishes. When I asked her what she wanted for her birthday item, she said pumpkin pie, so that's what I made.
After beginning the preparations for it, I realized that I had never actually made a pumpkin pie before, so I had a few worrisome moments while getting everything together, but it all turned out well in the end. The only flaw was the crust. I used a fancy pie shield to protect the crust from burning, which worked fine until I went to remove it 15 minutes prior to the end of baking time and it took off about one-quarter of the crust edge. So, it didn't look quite like it should, but it still tasted good, and I ate the crustless pieces since I don't like crust anyway!
This recipe came straight from the Libby's pumpkin can. I had a tough time finding pumpkin at the store, so I hope there is not a shortage like there was last year
Libby's Famous Pumpkin Pie
Ingredients:
1/4 c. sugar
1/2 tsp. salt
1 tsp. cinnamon
1/2 tsp. ground ginger
1/4 tsp. ground cloves
2 large eggs
1 can pumpkin
1 can (12 oz.) evaporated milk
1 unbaked 9-inch pie shell (I used a refrigerated one)
Directions:
1. Mix sugar, salt, cinnamon, ginger, and cloves in small bowl. Beat eggs in large bowl. Stir in pumpkin and sugar spice mixture. Gradually stir in evaporated milk.
2. Pour into pie crust.
3. Bake in preheated 425 degree oven for 15 minutes. Reduce temperature to 350 degrees and bake 40 to 50 minutes or until toothpick inserted in center comes out clean. Top will begin to crack a little when close to done. Cool on wire rack for 2 hours. Serve immediately after cooled or refrigerate.

Monday, October 25, 2010
Kitchen Adventures 5.2
October has been quite the crazy busy month. The best way I realize this is when I come to post and realize I only posted once so far this month. It's usually a busy month anyway, but with a wedding to prepare for things just got even crazier. We had a bachelorette party two weeks before the wedding, the next weekend was a fun home football game at OU, and then it was wedding time! I've had a great time hanging out with family and friends this month, and I realize just how fortunate I am to have the people I do in my life.
Amidst the craziness, I still had to eat. Last week I decided to try a family recipe that was in the Triple T cookbook. I probably won't post a recipe again this month as I brought home a whole pan of cheese tortellini from the wedding. :) But I'll share this recipe from last week, especially since it's such an easy one.
Family recipes are always the best, or at least I think so. This is one from my great-grandpa. I don't remember Mom making it much, but when we had Karen's family shower this was the recipe that almost all the Slaters thought about giving her. It's a great homestyle meal that will satisfy any craving for a good homecooked meal.
Grandpa's Meatloaf
Ingredients:
1.5 lbs. hamburger
1 pkg. onion soup mix
1/2 c. water
2 c. bread crumbs
1/4 c. ketchup
1 egg
Directions: Mix all ingredients together. Place in 7"x11" baking dish and mold into loaf. Bake for about one hour at 350 degrees.
How's that for an easy one? And it is quite possibly the best meatloaf I have ever had.
Here are a few pictures, and remember, meatloaf may not look good, but it is delicious!


Saturday, October 2, 2010
Kitchen Adventures 5.1
I have been trying to mix up my recipe usage recently, not repeating recipes very frequently. However, due to time constraints and available ingredients, I had to duplicate. Luckily, I was cooking for different events, which made it a little better.
A couple weeks ago I wanted something quick and easy for dinner. I found a good recipe in one of my Rachael Ray magazines and decided to try it out. Then this weekend I needed to make an appetizer for about 5 or 6 people, and I was low on ingredients. Fortunately, I still had all the ingredients to make this, and it works well as an appetizer as well. We needed good food for our OU/Texas watch party, after all. Gotta say, BOOMER SOONER!!:)
With this recipe, I ended up having to alter it slightly as I thought I had a key ingredient when I actually didn't. It still worked out, though, so I'm sure making it with the right ingredients would be delicious as well.
Cajun Chicken Fingers
Ingredients:
1 c. cornmeal (I used bread crumbs)
2 tsp. chili powder
1 tsp. dried oregano
Salt and pepper
2 large eggs
1 lb. chicken tenders
6 T. vegetable oil (omit this if you go the baking route as I did)
Directions:
1. In a shallow bowl, combine the cornmeal, chili powder, oregano, 1 tsp. salt, and 1/4 tsp. pepper. In another shallow bowl, beat the eggs. Working with one at a time, coat the chicken tenders with the cornmeal mixture, dip into the egg, then coat again with the cornmeal. Transfer to a foil-lined baking sheet.
2. In a large skillet, heat 1/4 c. oil over medium heat. Add half of the chicken and cook, turning over, until golden, about 5 or 6 minutes. Transfer to a plate and tent with foil to keep warm. Repeat with the remaining oil and chicken tenders.
*If you choose to bake rather than fry, place the chicken on a foil-lined baking sheet and pop in a 450 degree oven for about 12 minutes.

Kitchen Adventures 4.5
With the arrival of autumn, casseroles begin sounding more and more desirable. Now personally, a casserole sounds good to me any time of year, but they feel most fitting when the weather begins to cool and the leaves begin to turn. Though it hasn't gotten terribly cool down here yet, and the leaves are still mostly green, I'm feeling more and more like it's time for casseroles.
This recipe sounded pretty simple and delicious, and indeed it was. I picked this one from the Wheat State Manor cookbook my mom gave to me last Christmas. You can always count on those church ladies to provide good recipes, I like to say. Though not really casserole-y, it still counts in my mind. :)
Macaroni Sausage Casserole
Ingredients:
1/2 c. macaroni (I used 2 cups for a 9x13 pan)
4 qts. water
1/4 c. onion, chopped (I omitted this)
1/4 c. green pepper chopped (I also omitted this)
1 1/2 T. flour
1/4 tsp. salt
1 c. milk
1 c. shredded cheddar cheese
1 lb. ground sausage
Directions:
Cook macaroni as directed in boiling salted water; drain and set aside. Brown sausage and break up. Add onion and green pepper to the meat. Stir in flour and salt. Cook 1 to 2 minutes. Add milk slowly. Cook until thick. Add cheese; stir to melt continuously. Combine macaroni and meat mixture and pour in to greased casserole dish. Sprinkle with cheese. Bake at 350 degrees for 25 to 30 minutes.

Thursday, September 23, 2010
Kitchen Adventures 4.4
On most days, my time in the kitchen is fairly rewarding. I mix my ingredients, bake my goods, and turn out a pretty decent product. This recent baking event was quite literally an adventure, though.
Like every month, we have a birthday party at work. I asked the birthday girls what they wanted and they said chocolate (good girls!). I looked through mixingbowl.com to see if I could find a double chocolate something or other recipe. In the process, I came across a chocolate chip cookie cake recipe with M&M's on top. Sounds delicious, right? So I decided to give it a whirl.
After mixing up the dough and preparing the pan, I started to smoosh the dough into the pan. As I did this, I thought to myself, "Hmmm, this is a lot of dough for this pan. Maybe I should leave some out." But did I do that? No, of course not. I got it all in and popped it in the oven, ready for cookie bliss 14 minutes later.
About 6 minutes in, I begin to hear sizzling. I turn and look, and see a small flame in the bottom of the oven. I'm not a big fan of fire in any situation outside of a fireplace or roasting marshmallows, so this freaked me out. I shut the oven off and called home, only to receive no answer. I pulled the cookie out of the oven and blew on the flame, hoping to put it out. It died a little, so after waiting a minute I threw some water on it and out it went.
With that crisis averted, I turned to my half-baked cookie. I scraped off what was overflowing and thought, "Well what do I do now? The party is tomorrow and I'm gone all evening and I have no more chocolate chips." So, I stuck it back in the oven and turned it on again. It went another 5 minutes or so, then started overflowing again. Luckily, this time nothing caught fire. I pulled it out again, scraped again, and stuck it back in again a little later, turning on the oven one last time. Smoke started billowing with a minute left, so I decided that was the end of it. Fortunately, the cookie was done. I must say, if you're going to spill something cookie dough is a good one, it cleans up pretty easily.
With that ordeal done, I wondered how it would taste. I've never had a thrice-baked cookie, so I was unsure how the girls would take to it. Look at the picture below to see what they thought about it.
Here's the recipe. Now maybe this person used a deep-dish pizza pan or something, but for future reference, cookie dough grows so don't stick it all in one flat round baking pan.
Confetti Topped Chocolate Chip Cookie Cake
Ingredients:
2 sticks unsalted butter, softened
1 cup packed dark brown sugar
1/2 cup granulated sugar
2 large eggs
2 "heaping" cups of all purpose flour
1 teaspoon baking soda
1/2 teaspoon salt
2 teaspoons vanilla extract
2 cups semi-sweet chocolate chips
1 cup chopped walnuts
Regular or "mini-sized" multi-colored M & M's
Directions:
1. Preheat oven to 375 degrees. Spray a large, round pizza pan OR a large cookie sheet with sides (mine measures 17.5 x 12 inches) with cooking spray; set aside.
2. Cream together the butter, brown sugar and granulated sugar (I used my stand mixer, but you can use a hand-held one). Add the eggs, one at a time and beat well after each addition.
3. In a separate bowl, put the flour, baking soda and salt and mix together thoroughly.
4. Add the flour to the creamed mixture, mixing thoroughly to incorporate. Add the vanilla extract and mix thoroughly.
5. Fold in the chocolate chips and the chopped nuts, stirring to combine.
6. Put the cookie dough on the prepared pizza pan or cookie sheet; using the back of a large spoon, spread the dough evenly on the pan. Sprinkle top of dough with M & M's...more or less to your own liking!
7. Bake in the center of the oven until edges are browned; the center wll still look UNCOOKED but take it out anyway. The pizza size should take about 20 minutes (a little thicker than cookie sheet) and my large cookie sheet took only about 12 minutes.
KEEP AN EYE ON IT SO YOU DON'T OVERCOOK IT... YOU WANT THIS NICE AND SOFT AND OOEY, GOOEY!!!
8. Set on cooling rack until almost completed cooled; cut pizza pan in wedges or cookie sheet into squares of size desired.

Friday, September 17, 2010
Kitchen Adventures 4.3
Normally, I am not one to experiment with recipes. As many people can attest, I rarely deviate from a recipe and it's specific directions unless I really don't like an ingredient. However, while walking home from work Wednesday and thinking about what to make for small group snack, I suddenly felt the urge to experiment. I wanted to make chocolate peanut butter brownies--I felt regular brownies were just not quite the order for the evening. I looked for several different recipes online before finally deciding to just make my own and see what happened. Fortunately, this experiment turned out well. I simply added some melted peanut butter to my brownie mixture and called it good, and it was a huge hit. Yay for experiments that turn out well!
The original brownie recipe is from the Better Homes & Gardens cookbook
Cake Brownies (with peanut butter addition)
Ingredients:
3/4 c. butter
1 1/4 c. sugar
1/2 c. unsweetened cocoa powder
2 eggs
1 tsp. vanilla
1 1/2 c. flour
1 tsp. baking powder
1/4 tsp. baking soda
1 c. milk, plus additional for peanut butter mixture
1 c. chopped nuts (optional)
1/2 c. peanut butter
Directions:
1. Preheat oven to 350 degrees. Grease a 9x13 pan (or a 15x10x1 pan) and set aside. In a large microwaveable bowl, microwave butter on high for 1 1/2 to 2 minutes or until melted. Stir in sugar and cocoa powder until combined. Add eggs and vanilla. Using a wooden spoon, beat mixture lightly just until combined.
2. In a small bowl combine flour, baking powder, and baking soda. Alternately add flour mixture and 1 c. milk to chocolate mixture, beating after each addition. Stir in nuts if desired.
3. Pour batter into prepared baking pan. *Addition: melt peanut butter with several T. of milk in small pan over medium-low heat just until creamy. Pour over brownie batter in pan and swirl with spoon.
4. Bake for 15 to 18 minutes or until a toothpick inserted into the center comes out clean. Cool on a wire rack 2 hours. Cut into bars.
Apologies for the dark picture, it's all I have.

Kitchen Adventures 4.2
Every now and then I expand my horizons and try a new recipe that includes ingredients I would not normally use. I tried that this week, and the results were not too bad.
I never thought I liked spinach until I tried a salad of baby spinach leaves and discovered just how delicious it can be. However, cooked spinach is a different story. I think spinach is going to be like carrots for me; I much prefer them raw rather than cooked. But, I am glad I tried something new, and if nothing else maybe someone else will see the recipe and give it a try.
As a note, I modified the recipe a bit. Rather than using small shells I used jumbo ones because that is what I had. Also, I omitted the onion because the last time I used onion it was way too overpowering. I'll include them in the recipe, though. I also only used 3/4 lb. of spinach rather than an entire pound.
This recipe came from one of my Rachael Ray magazines.
Spinach and Ricotta with Shells
Ingredients:
1 pound small pasta shells
1/2 c. extra virgin olive oil
1 onion, chopped
1 clove garlic, finely chopped
1 pound baby spinach
1 pound ricotta cheese
3/4 c. grated parmesan cheese, plus more for topping
Directions:
1. In a large pot of boiling, salted water, cook the pasta until al dente; drain and return to the pot.
2. Meanwhile, in a large skillet, heat the olive oil over medium head; add the onion and garlic and cook until the onion is softened, about 5 minutes. Add the spinach by the handful and cook, stirring, until wilted, about 3 to 4 minutes.
3. Add the spinach mixture, ricotta and 1/4 c. parmesan cheese to the pasta and toss. Serve immediately with more paremesan cheese.

Kitchen Adventures 4.1
We all have those delicious standby recipes that we can go to in a pinch for something bound to be a crowd-pleaser. One of my favorite recipes is something I first tried three years ago after a friend made it for dinner. It has also made me look at almost every recipe on food packaging, because sometimes those are some of the best ones.
I knew with my roommate from my first two years at Pitt coming to visit I would need something that would feed more than me but would not take very long to make. I turned to this enchilada recipe for something fairly quick, very easy, and absolutely delicious. We mixed things up a little bit by using whole wheat tortillas rather than regular flour tortillas, and surprisingly they were very good! The whole wheat gave them a little sweeter taste, which you don't normally expect with enchiladas, but I'd make them that way again in a heartbeat. As a caveat, I never remember the recipe, I always just look at the enchilada sauce can, so this is going off my memory. :)
Beef Enchiladas
Ingredients:
1 lbs. ground beef
1 can red enchilada sauce
1 bag shredded cheese
1-2 packages 8" tortillas
Directions:
Brown the ground beef and drain. Add 1/2 c. of enchilada sauce to the beef in the skillet along with 1/4 c. of cheese. Stir to combine. Grease 9x13 pan and preheat oven to 350 degrees. Fill tortillas with enchilada mix. Place rolled tortillas in casserole dish, then pour remaining sauce over enchiladas and finish by sprinkling rest of cheese over enchiladas. Bake for 15 minutes or until cheese is melted.
Here is a picture of the final product.

As a bonus, here are some pics from Steph's visit.
Zoo adventures, including being on lockdown while zookeepers try to find an escaped chimp


OKC Bombing Memorial


And of course a couple baseball games at the Bricktown ballpark.


Monday, September 6, 2010
Circle of Life
Sometimes life throws unexpected events your way. Other times you see the inevitable coming and just wait tensely until it gets here. Death is one of those things that is expected eventually, but the timing is sometimes what throws people. Over the past week, I've seen it both ways, and no matter how it comes or approaches, it still hurts when it arrives.
After five years of declining health and being confined to a bed for the past two years, Grandpa went home to heaven Friday morning. We all knew it was coming, and this was not the first time we prepared for the end, but even though I knew it would be soon, I still had to cry when it happened. However, the tears are not for Grandpa. Why would you cry for someone who is out of their pain and living with Jesus? Instead, we cry for those left behind that experience the hole in their life that the one who has left us used to fill. Grandma and Grandpa had been married 72 years. I cannot fathom being with someone for that long, probably because I am not married and have no prospects of it in the near future. But for Grandma, Grandpa has been her constant companion for most of her life. And for the past five years, he has been what keeps her going. All her decisions revolved around taking care of Grandpa. Without that in her life now, I am unsure if she will either embrace the new freedom she has, or fall to pieces. She's a strong woman, though, so though the time will be tough, I think she will be able to persevere.
That was an expected death. Sometimes, though, death sneaks up on us and waits off to the side, lurking to step in and take someone without notice. Last week I received news that a former member of our small group, Chris Murphy, was in very serious condition at a local hospital. He had been found unresponsive and with a 107 degree fever. When he got to the hospital, he experienced massive kidney failure and cardiac arrest. He is currently on life support and his parents have flown in from out of state and out of country in order to decide what to do. As of the last update I had, his condition was unchanged and they were meeting to decide if keeping him on life support would be the right decision. In this situation, death has not occurred, but it seems to be lurking just off stage. However, we know that with God all things are possible. If it is His will, Chris will be able to recover and continue his work here on earth by sharing God's love with everyone he meets. And if it's His will to bring him home, then we know that Chris will be praising Jesus up in heaven.
Those two situations contrast with each other. One, an old man who lived a long and full life; the other, a young man who just appeared to be starting his life. The common strand that binds them, though, is the love of Jesus. Both these men loved the Lord, and I know that no matter what happens, I'll see them both in heaven someday.
Amidst those situations relating to the end of life and fighting to live, there is also new life coming into this world. Within the past five days, three couples have announced that they are expecting their first child, all to be born in March or April. To me, this has been the ironic reminder that as one life ends, another begins. All the couples are very excited about the new life that will be joining their family, and I am excited for them! Apparently the old saying is reversed in this situation. I've heard it said that deaths come in threes, but it appears that instead births will be coming in threes!
Life is indeed a circle. We live, we die, and we receive new life with Jesus if we believe in Him. I pray for those that are experiencing loss, that they will find comfort in their time of need. And, I pray for those getting ready for new life, that they will find the strength and courage to lead the new little person joining their family through the journey we call life.
Saturday, August 28, 2010
Kitchen Adventures 3.5
Baking is one of my main stress relievers. After the crazy week at work, I needed to destress before the weekend and all the fun it holds. Plus, I needed to bake for the youth group cookout Sunday evening, so I killed two birds with one stone.
I tried two new recipes, but they are versions of other recipes I have used or have eaten before. The first came from mixingbowl.com, which has provided some good ones for me. The second one came from the handy Triple T youth group cookbook and it's a recipe my mom has made many times, so I knew it would be good. They both smelled delicious, so hopefully everyone will enjoy them tomorrow evening!
Brown Sugar Banana Muffins
Ingredients:
1/2 c. chopped pecans
1/2 c. butter, softened
1 c. firmly packed brown sugar
2 large eggs
1 c. mashed ripe bananas, about 2 large
1/4 c. buttermilk
1 t. vanilla extract
2 1/4 c. flour
3/4 t. baking soda
1/2 t. baking powder
1/2 t. salt
Directions:
Preheat oven to 350 degrees. Bake pecans in single layer in shallow pan 8 to 10 minutes or until nuts are toasted and fragrant. Beat butter at medium speed with mixer until creamy. Gradually add brown sugar, beating until light and fluffy. Add eggs, one at a time, beating just until blended after each addition. Stir together mashed bananas, buttermilk, and vanilla. Stir together flour and next 3 ingredients; add to butter mixture alternately with banana mixture, beginning and ending with flour mixture. Beat on low speed just until blended after each addition. Don't overbeat. Spoon batter into lightly greased 12 cup muffin pan, filling 2/3 full. Sprinkle with roasted pecans. Bake for 20 to 25 minutes or until a toothpick comes out clean. Immediately remove from pan to wire racks and cool 10 minutes. Makes 1 dozen muffins.
*If you don't have buttermilk, stir 3/4 t. lemon juice or vinegar into 1/4 c. milk.

Reese's Peanut Butter Cup Chocolate Cookies
Ingredients:
1 c. butter
1 1/2 c. sugar
2 eggs
2 tsp. vanilla
2 c. unsifted flour
2/3 c. cocoa
3/4 tsp. baking soda
1/2 tsp. salt
2 c. peanut butter chips
Directions:
Cream butter, sugar, eggs, and vanilla until light and fluffy. Combine flour, cocoa, baking soda, and salt; add to creamed mixture. Stir in peanut butter chips. Chill until firm enough to handle. Shape small amounts of dough into 1 inch balls. Place on ungreased cookie sheet and flatten slightly with a fork. Bake at 350 degrees for 8-10 minutes. Makes six dozen.
Here are a couple pics:


Kitchen Adventures 3.4
Every baker and cook has off days. Well, Tuesday was mine. After working 8 a.m. to 10 p.m. Monday to cover a shift, I was looking forward to making dinner Tuesday. I got home from Tone It Up, showered, and was ready to roll. However, if was just not my night. The cooking process was not the problem, but more along the ingredient amounts. I used too much onion and not enough blueberries. I also had more pork than I needed, but that's just what I got on sale. It's edible at least, but not the best I've ever made. I'll have to give it a try again sometime to see if I can remedy the mistakes.
Pan Fried Pork with Blueberries
Ingredients:
2 lbs. boneless pork loin, cut crosswise into eighths
Salt and pepper
1/4 c. flour
2 T. extra-virgin olive oil
1 small onion, finely chopped (make sure it's small and not medium)
1 1/4 c. chicken broth
1 c. blueberries
2 T. butter
Directions:
1. In a medium bowl, season the pork with salt and pepper. Add the flour and toss to coat. In a large skillet, heat the evoo over medium heat. Shaking off any excess flour, add the pork to the skillet and cook, turning once, until browned, about 5 minutes total. Transfer to a plate.
2. Add the onion to the skillet and cook, stirring, over medium-high heat for 1 minute. Add the chicken broth and blueberries; bring to a boil and cook until reduced by half, about 5 minutes. Stir in the butter and season with salt and pepper. Turn off the heat and return the pork and any juices to the skillet. Divide the pork among 4 plates and spoon the sauce on top.
Here are a few pics:


Thursday, August 19, 2010
Kitchen Adventures 3.3
For the second time this week, we are having a party at work. This time, though, it is to bid farewell to students that are leaving us. That's the thing about university student jobs, they all leave eventually for some reason or another. One of our longtime student workers is leaving us to gain experience in a different library setting, so to celebrate we are gathering for food tomorrow. She requested chocolate, so I did my best to satisfy the request. I think this recipe will do the trick! This recipe came from the recipes included when you buy a three-pack of Crisco. I'm sure I have had them before, but I was reminded once again how wonderful they truly are!
Chewy Brownie Cookies
Ingredients:
2/3 c. Crisco
1 1/2 c. firmly packed light brown sugar
1 tbsp. water
1 tsp. vanilla
2 eggs
1 1/2 c. flour
1/3 c. unsweetened baking cocoa
1/4 tsp. baking soda
1/2 tsp. salt
1 12 oz. bag semi-sweet chocolate chips
Directions: Combine Crisco, brown sugar, water, and vanilla in mixing bowl. Beat at medium speed until well combined. Beat in eggs. Combine flour, cocoa, soda, and salt in separate bowl. Add flour mixture to sugar mixture until just combined. Stir in chocolate chips. Drop spoonfuls of dough onto ungreased cookie sheets. Bake at 375 degrees for 7-8 minutes or just until set; do not overbake. Cool 1 -2 minutes before removing from cookie sheet.
Makes about 3 dozen cookies

Kitchen Adventures 3.2
It seems I don't get to go home very often, but when I start going it seems like I do several weeks in a row. This was the case recently, though I went to different "homes" each time. This past weekend I made the trek up to Kansas City with my friend Shaye for our friend Stephanie's wedding. On the way, we stopped and saw my Aunt Lori at the travel center, which was a nice break from the road, and it was great to see her. Then we continued up to my cousins Rob and Eileen's house in Overland Park. I don't get to see them often, but their house is always open to me whenever I make my way up to KC, which is wonderful. It also gives me a little time to chat with them since I don't see them often.
Our fun activities included the rehearsal dinner and bowling Friday night, visiting the Nelson-Atkins art museum and seeing our friend Andy Dale before the wedding, and of course the wedding and the reception. I am so happy for my friends! I can honestly say I have rarely seen two people more perfect for each other than Stephanie and Brian. Best of luck you guys!
To top off the lovely trip, we stopped in El Dorado on the way home, hoping to see my grandparents and some friends. However, we got there too early to see Nana and Pop, so after leaving Pop's birthday picture at their house we headed over to Spangle's and met Tom and Cory for lunch. I had not seen Tom since Christmas and had not seen Cory since his accident a couple weeks ago, so it was great catching up with them. Here are some pics from the trip.

Famous shuttlecock at Nelson-Atkins

Saying the vows

First dance. Good job Brian!

Me and Shaye after the reception

Cory, Tom, and I catching up at Spangle's
When we got home, I did not have time to go to the store until Monday, when Shaye and I stopped after stamp club. Fortunately, I had most everything I needed already to make my dinner for the week. I always enjoy trying recipes that friends and family love. What better judge can there be than someone you trust? I got this one from Marcus back when we dated. It's pretty easy and very delicious, which of course is my favorite combination! :)
Poppyseed chicken
Ingredients:
2 c. diced cooked chicken
1 can cream of chicken soup
1 can cream of mushroom soup
3/4 stick butter, melted
1 c. sour cream
1 tube Ritz crackers
2 tbsp. poppyseds
Directions:
Mix diced chicken with undiluted soups. Add sour cream and salt and pepper to taste. Roll crackers with rolling pin in plastic bag until finely crushed. Add poppyseed to melted butter, then add crackers to butter mixture. Put chicken and soup mixture in buttered casserole dish and top with cracker/butter mixture. Bake at 350 degrees for 25 to 30 minutes.


Kitchen Adventures 3.1
Well I'm just a little late getting this up. but honestly I have not done much baking or cooking recently, or at least anything new. Being out of town two weekends in a row, officially starting a new job, and preparing for the new school year all take up precious baking and cooking time. But I'm back to baking now, so all is well. :)
Brief recap on recent activities: I got to go home two weekends ago for my sister's first wedding shower. This was the family one, so of course I wanted to be there. I had a great time seeing everyone, some of whom I had not seen in almost two years since I missed BOTH family Christmases last year. Plus, I got some quality immediate family time as well. I even talked Dad into a sunset motorcycle ride, which was lovely.
After coming back, I kept plugging away at work, handling photo orders, staffing issues, and everything that comes with being a manager. Thank goodness our Bible study is on servant leadership! I had no idea it would be so applicable when we started, but it has been amazing to learn how to lead like Jesus and actually get to apply it
A necessary part of work is celebrating birthdays. Each month we have a birthday party for all the birthday-ees for the month. This month, we celebrated my boss and one of our GAs. Our other boss got an amazing cupcake cake, Spongebob Squarepants themed, which was awesome. I contributed jumbo chocolate chip cookies, which were also good. I must say, they were a little different than I anticipated, but I think that's because I have started baking with butter instead of margarine. Growing up, we always used margarine, but for some reason I decided to start using butter, and it just makes things bake differently. These were very dense cookies, not terribly soft, but still delicious.
This recipe came from the Wheat State Manor cookbook, and the recipe was contributed my a wonderful lady from my church, Edna Bayes.
Jumbo Chocolate Chip Cookies
Ingredients:
1 1/2 c. flour
1 tsp. baking powder
1 tsp. baking soda
1 1/2 c. butter (I did not use this much, that's a lot!)
1 1/4 c. sugar
1 1/4 c. packed brown sugar
2 eggs
1 tsp vanilla
1 12 ox. pkg. semi-sweet chocolate chips
Directions:
Combine flour, baking soda, and baking powder in mixing bowl. Set aside. Combine butter, sugar, and brown sugar in large mixing bowl. Beat at medium speed, scraping bowl often, until creamy. Add eggs and vanilla. Continue beating, scraping bowl clean, until well mixed. Reduce speed to low. Beat, gradually adding flour mixture until well mixed. Stir in chocolate chips. Drop dough by 1/4 cupfuls, 2 inches apart onto ungreased cookie sheet. Set oven to 375 degrees and bake for 10 to 14 minutes until lightly golden brown, but do not overbake. Let stand 1 or 2 minutes before removing from cookie sheet.
Note: Makes about 30 cookies. For 2 1/2 inch cookies, drop by rounded tablespoonfuls. Bake 10 to 12 minutes. Makes 4 dozen cookies
Second note: I did not have enough chocolate chips, so I did half chocolate and half butterscotch chips. It was a nice change.

Saturday, July 31, 2010
Kitchen Adventures 2.8
Like most people just out of college or in their mid-twenties, I've been to a few wedding and bachelorette parties in my day. It inevitable with all the friends that get married either during or shortly after college. Last night we helped a friend celebrate her upcoming with a causal, laid-back bachelorette party. After dinner at Panda Garden, we met back at my place for cookie decorating, drinks, and games.
I had seen cute pictures from bachelorette parties and wanted to figure out how to make those cute cookies. My good friend Kara came through with heart cookies cutters in two sizes, so that gave us variety. If you turn a heart upside down, voila! You have the template for decorating a beautiful bra. And if you cut the tip off a heart before baking the cookie, you've got the makings of a bountiful booty. We had a great time decorating our cookies, talking, laughing, and hanging out. And now I have so many cookies left to decorate and eat! :)
I had a sugar cookie recipe from a different cookbook, but I lost that page so turned to a back-up. I had enough time to make the dough one day and bake it a couple days later, so I made the traditional "chill over night" sugar cookies. This recipe came, once again from the triple T youth group cookbook. This contribution is from Kim (and Molly) Hague, some good friends back home. Delicious!
Aunt Roxy's Old Fashion Sugar Cookies
Ingredients:
1 c. butter
1 1/2 c. sugar
3 eggs
1 tsp. vanilla
3 1/2 c. sifted flour
2 tsp. cream of tarter
1 tsp. baking soda
1/2 tsp. salt
Directions:
Cream butter and sugar until light and fluffy. Add eggs, one at a time, beating after each so as to remain light and fluffy. Gradually add dry ingredients. Chill overnight. Roll to 1/8 to 1/4 inch thick on floured surface. Bake at 375 degrees for 6-8 minutes. Makes about 8 dozen.
*Note that is 8 dozen round, not 8 dozen hearts. :)
Here are some pics, both before and after decorating.


Subscribe to:
Comments (Atom)
