Sunday, November 21, 2010

Kitchen Adventures 6.4

As a librarian, one of my favorite things to do is share knowledge and information. With the social media we have today, this sharing is made even easier. Sometimes, since we are so connected all the time, we can get bombarded with information, which can lead to information overload. At times, when I'm searching for a recipe online, I feel this way. One way we overcome this information overload is by turning to trusted sources, namely people we see as authorities on a subject. For instance, I will turn to my friends that know about computers before checking another source. We like going to a person more than a remote source, generally speaking.

Another way to cut through this overload it to use recipes (or information) people specifically send you because they know you are interested in a subject. Over the past week I have had two people send me recipes, which I love! (If you have a favorite, send it my way!) I received a letter from my Nana with a sugar cookie recipe in it, which I will definitely be using soon. The other was this recipe, which my friend Tara saw on a blog and shared with me via Facebook. That is one of the perks of our social networks, sharing information so easily. She shared the link with me, I checked out the blog and copied the recipe into a Word document and saved it, then I'll copy it from that document into this blog post. The ease of sharing this information makes me more likely to share information because it IS so easy to do. Yay for social networks (in this instance)! also, here is a link to the original blog post: Brown-Eyed Baker

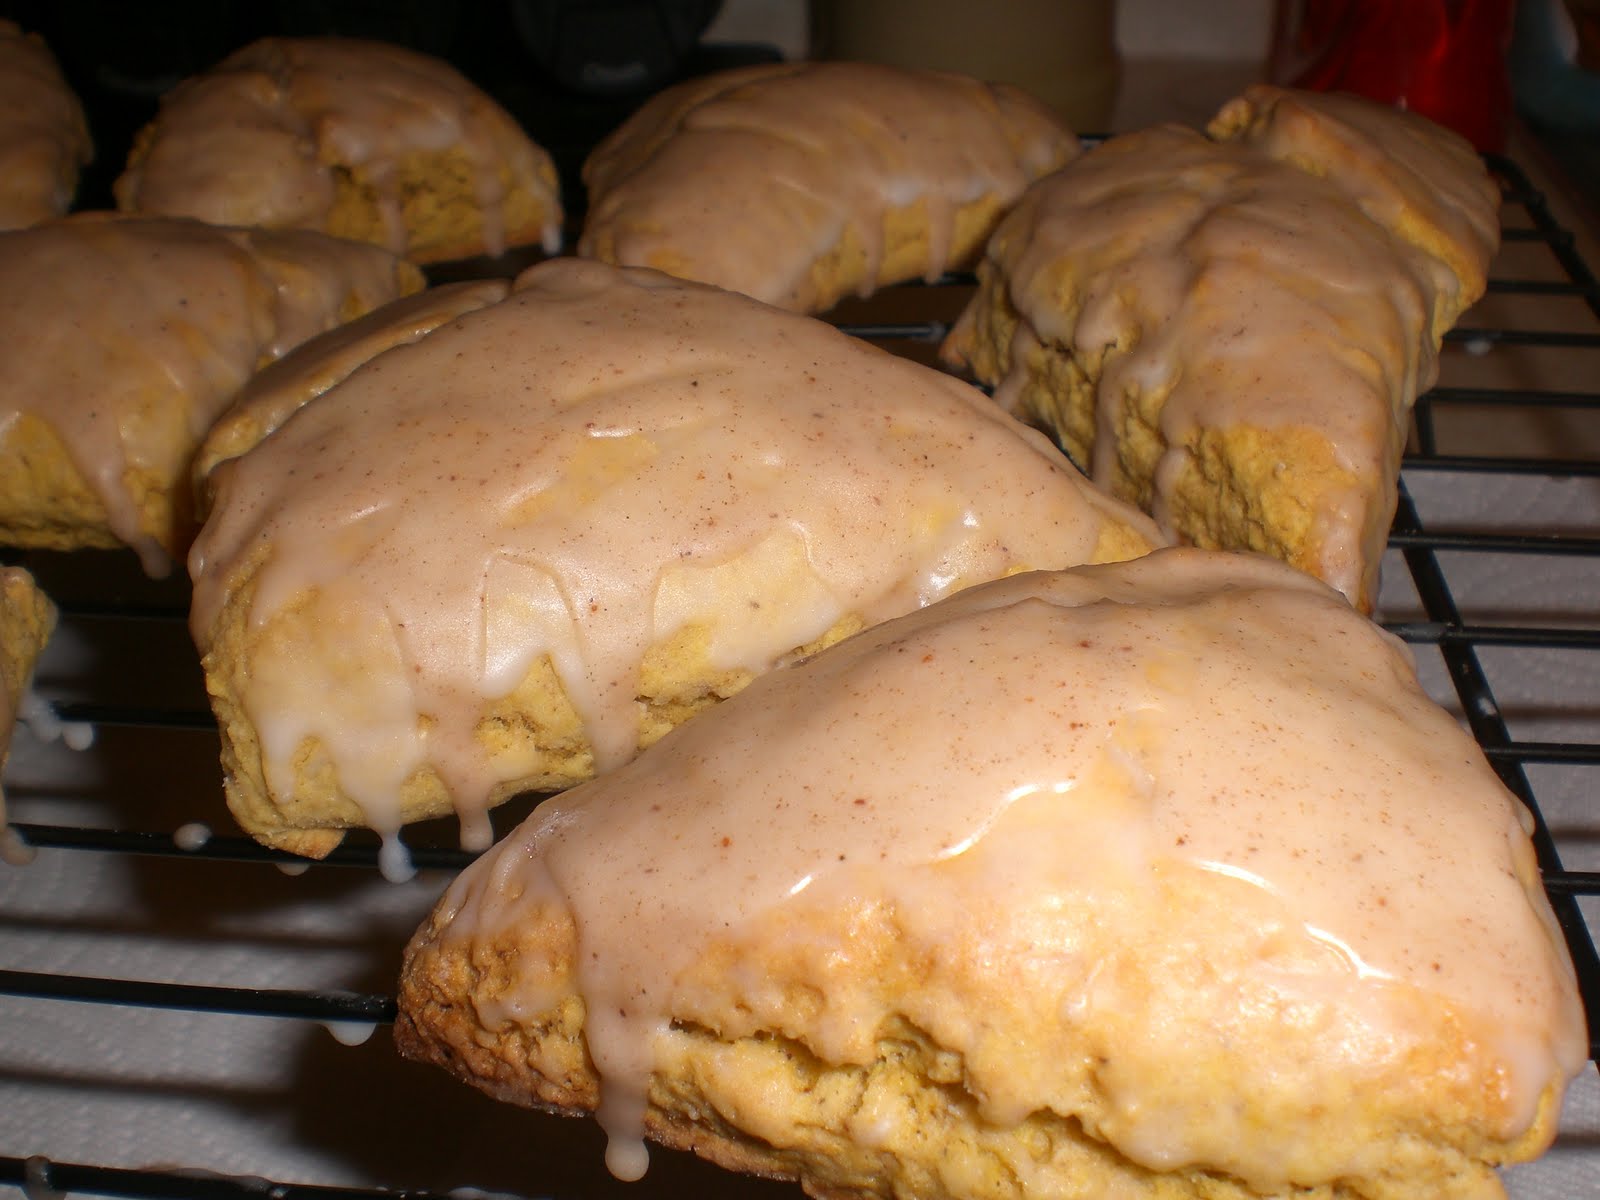
This was a pretty quick recipe to make, and they cooled quick enough for me to get them completely finished within two hours, which is pretty good for me when I'm making a recipe for the first time. Since they are scones they are fairly dense, but the icing and glaze on top add just enough sweetness to make all the chewing enjoyable. These are a great fall treat for sure! Thanks again, Tara, for sharing this with me!

Pumpkin Scones with Spiced Glaze

Yield: 12 scones

Ingredients:

For the Scones:
2 cups all-purpose flour
7 Tablespoons granulated sugar
1 Tablespoon baking powder
1/2 teaspoon salt
1/2 teaspoon ground cinnamon
1/2 teaspoon ground nutmeg
1/4 teaspoon ground cloves
1/4 teaspoon ground ginger
6 Tablespoons cold butter
1/2 cup canned pumpkin
3 Tablespoons half-and-half
1 large egg

For the Powdered Sugar Glaze:
1 cup plus 1 Tablespoon powdered sugar
2 Tablespoons milk

For the Spiced Glaze:
1 cup plus 3 Tablespoons powdered sugar
2 Tablespoons milk
1/4 teaspoon ground cinnamon
1/8 teaspoon ground nutmeg
1 pinch ground ginger
1 pinch ground cloves

Directions:

1. Preheat the oven to 425 degrees F. Line a baking sheet with parchment paper; set aside. (I just sprayed the baking sheet with cooking spray.)

2. Combine flour, sugar, baking powder, salt, cinnamon, nutmeg, cloves and ginger in a large bowl. Use a fork or pastry cutter to cut the butter into the dry ingredients until mixture is crumbly and no chunks of butter are obvious; set aside.

3. In a separate bowl, whisk together the pumpkin, half-and-half and egg. Fold wet ingredients into dry ingredients, and form the dough into a ball. Pat out dough onto a lightly floured surface and form it into a 1-inch thick rectangle about 3 times as long as wide. Use a large knife or a pizza cutter to slice the dough twice through the width, making three equal portions. Cut each of the portions in an X pattern (four pieces) so you end up with 12 triangular slices of dough. Place on prepared baking sheet. Bake for 14-16 minutes, or until light brown. Place on wire rack to cool.

4. To make the powdered sugar glaze, mix the powdered sugar and milk together until smooth. When scones are cool, use a brush to spread plain glaze over the top of each scone. (I did two coats.)

5. To make the spiced glaze, while the powdered sugar glaze is firming, combine all of the ingredients for the spiced glaze. Drizzle over each scone and allow the icing to dry before serving (about an hour). (I ended up using the leftover regular powdered sugar glaze and adding 1 c. powdered sugar and about 1 T. milk along with the spices.)


Kitchen Adventures 6.3

If I've said ti once, I've said it a thousand times: some of the best recipes you can find come from church cookbooks. One of my favorite cookbooks is from my youth group fundraiser years ago. Each year we took a mission trip, usually to a GROUP workcamp or local mission. I had wonderful opportunities to serve people in South Dakota (twice!), New Mexico, Oklahoma, Minnesota, Colorado, and Tennessee. For each trip we did several fundraisers, and one year this cookbook was a big one for us. What makes this cookbook different from your regular church cookbook is that we had several different people to draw from as our youth group was actually three churches combined along with several others that attended different churches, so we had quite a variety of recipes. I always check this first if I'm looking for a good recipe. Thanks, Mom, for getting this for me! This recipe was contributed by Kim Hsgue, one of my mom's good friends. Thanks, Kim!

I had to amend one of the key ingredients in this recipe as I could not find it at the store. luckily, my friend Shaye, aka my grocery shopping buddy, suggested a good alternate. I could not find a loaf of frozen bread at Target, so instead I used a refrigerated pizza crust. It was not one of the circle ones but one you roll out. This worked pretty well for what I needed to do, and it took much less time as i did not have to wait for the bread to rise. If you choose to use a pizza crust instead, make sure you cook it according to the pizza cooking directions, not necessarily the recipe cooking times and temperatures. You could also add whatever you want inside, but I liked the original ingredients so did not change them.

Stromboli

Ingredients:

1 loaf Rhodes frozen bread (or pizza crust)
ham
hard salami
provolone cheese
garlic powder
Italian seasoning
1 egg yolk
Parmesan cheese

Directions:

Let bread defrost and rise on cookie sheet. Roll out around the cookie sheet. Layer ham, salami, and provolone cheese. Sprinkle on garlic powder and Italian seasoning, to taste. Roll up jelly-roll style and seal all edges. Brush on egg yolk and sprinkle with Parmesan cheese. Bake at 375 degrees for 25-30 minutes.

Kitchen Adventures 6.2

I have quite a bit of catching up to do on here! The last week or so has been incredibly crazy, to put it mildly. I've been busy at work, dealing with lots of little issues there, and then finding way too many things to do with my free time. But, hanging out with my friends doing things like celebrating jobs, hitting up the monthly art walk, going to football games and out to dinner, church things, and random shopping trips make my life that much better.

All those fun things, though, keep me away from posting more frequently. For instance, this is a recipe I made about three weeks ago and just never found time to post after making it.

This is the perfect recipe for a chilly fall evening, which to me is soup weather. It also freezes decently well, and I just finished it off this week by sharing with a few friends for dinner one night. I got this one from a binder my Aunt Kathie gave me a couple Christmases ago. She had it at Thanksgiving and showed everyone and I just had to have a copy. I'm not sure where she got the recipes, but if anyone wanted the source for this one I could ask. It's a good one for sure!

A couple notes I learned the first time I made this that made this go-round much better. First, make sure you chop your potatoes to a fairly standard size, that way the chunks cook the same amount. Second, make sure you have the potatoes chopped, onions chopped, and bacon cooked and crumbled before starting the flour and butter. You will not have enough hands to chop, stir, and crumble all at the same time! Finally, you will have to stir for awhile to get the milk to thicken. I probably could have stirred it a little bit more, but it turned out fine.

Baked Potato Soup

Ingredients:

2/3 c. butter or margarine
4 sliced green onions (I omitted these)
1 c. sour cream
1 1/4 c. shredded cheddar cheese (I used a little more)
7 c. milk
12 cooked, crumbled bacon strips
2/3 c. flour
4 lg. baking potatoes OR hash browns (I used potatoes)

Directions:

Chop potatoes and onions and cook bacon. In a large soup kettle or dutch oven, melt the butter. Add in flour, heat and stir until smooth. Gradually add milk, stirring constantly until thickened. Add potatoes and onions. Bring to a boil, stirring constantly. Reduce heat and simmer for 10 minutes. Add remaining ingredients, stir until cheese is melted.


Friday, November 12, 2010

Kitchen Adventures 6.1

I can't believe it's been six months since I started posting my recipes and sharing how food ties into my life! I recently looked back at all of them, and there were almost thirty recipes! I've been a busy baker! Coincidentally, my maternal grandmother's maiden name was Baker. Ironic, no? :)

This post's entry is courtesy of the Carl Albert Center bake-off contest. This contest has been going on for the past six weeks or so between people in the Archives office. I was an honorary member as I used to be a student worker and GA there. And, conveniently for me, I just moved up a floor so I can easily participate. Everyone has contributed some wonderful baked goods. I'm sure they are ready for me to stop popping in to see if they have food for me, but the contest is almost up, so no worries there.

This is a recipe I got from a friend from college. I saw that she had posted a status update on Facebook regarding this delicious-sounding recipe, and I mentioned how good they sounded. Well, she sent it to me! I'm very grateful for that, and that small move pretty much made my day when I received it. I love getting recipes that other people love as it gives it a bit more credence in my mind. The only stipulation was that I change the recipe just a bit from the original wording and credit it to the proper person, which I can totally do. I received the recipe from Danielle Leivian and she received it from another blog. My switch is the muffin size--originally it was mini muffins, but with no mini muffin pan I made regular-size muffins. Also, I used a new silicone pan I got from an estate sale for one batch and a regular metal pan for another. I also ended up being 1/4 c. short on molasses sadly, but forgot to add in more liquids to compensate for that with the first batch I baked. The second ones were a little better as I had added a bit more milk. Leaving out part of the molasses works if you are making them for people that are not big fans of gingerbread as it makes it a little less overpowering.

Gingerbread Muffins

Ingredients:
1 c. dark brown sugar
2 1/2 c. flour
1 1/2 tsp. baking soda
1 tsp cinnamon
1 tsp ground ginger
1/2 tsp. salt
1/4 tsp nutmeg (you could use closer to 1/2 if you prefer)
1 egg
1/2 c. of molasses
1 c. buttermilk (or add 1 T. vinegar to 1 c. milk and let sit for 10 minutes)
1/2 c. melted butter.

Directions:
1. Preheat the oven to 350 degrees.
2. Mix the dry ingredients in one larger bowl.
3. Mix wet ingredients in a smaller bowl.
4. Add wet ingredients to dry ingredients and stir until just blended.
5. Spray each muffin cup and fill 3/4 full with batter.
6 Bake for 15 minutes or until toothpick comes out clean.

I liked these, but I think I need to make them again with the proper amount of molasses. Still tasty, though!

Saturday, November 6, 2010

Kitchen Adventures 5.4

Each year we always have some type of fruit to harvest in the orchard back home. I love picking fruit, but I rarely ever eat anything I pick. This year, though, we had a bountiful crop of apples and pears, and they were actually tasty. Sometimes it's just not a good fruit year, but the conditions were right for our trees this year I guess.

While I was home for Karen's wedding I took a break from wedding festivities to pick some apples and pears to bring back with me. I ended up with waaay more fruit than I needed, especially since I'm not a big pear fan. I gave quite a bit away, but I still had some left. After discovering Food Gawker from the girls at work, I decided to see if I could find a good pear recipe. I ended up looking at several blogs from different countries, which was a neat experience. My final selection was a pretty scrumptious pear tart. I had never made a tart or cooked with pears before, so i did not quite know how it would turn out. It was a little work (peeling pears takes time), but it was worth it in the end.

This recipe came from a blog I found through Food Gawker. Here is a link to the website: jun-blog.

Making a Farm Wife’s Fresh Pear Tart *adapted from Marcella Hazan’s Essentials of Classic Italian Cooking

Ingredients:

2 eggs
1/4 c. milk
1 c. sugar
salt
1 1/2 c. flour
2 pounds fresh pears
butter for greasing the pan and dotting the cake
1/2 c. dry, unflavored bread crumbs
1 dozen cloves, optional (I did not use these)

Directions:

1. Preheat the oven to 375 degrees
2. Beat the eggs and milk together in a bowl. Add the sugar and a tiny pinch of salt, and continue to beat. Add the flour, mixing it in thoroughly to produce a compact cake batter.
3. Peel the pears, cut them lengthwise in two, scoop out the seeds and core, then cut them into thin slices about 1 inch wide, Add them to the batter in the bowl, distributing them evenly.
4. Smear a 9-inch cake pan generously with butter, sprinkle lightly with bread crumbs, then turn the pan over and give it a sharp rap against the counter to shake loose excess crumbs.
5. Put the batter into the pan, leveling it off with the back of a spoon or a spatula. Make numerous small hollows on top with a fingertip and fill them with little bits of butter. Stud with the optional cloves, distributing them at random, but apart. Place the pan in the upper third of the preheated oven and bake for 50 minutes, or until the top has become lightly colored.

What I liked about this was that the fruit did not turn mushy. It may have been the type of pears I used, but they stayed fairly crisp after baking. It is delicious slightly warm, but also good at room temperature.

Kitchen Adventures 5.3

I don't feel like I did much cooking or baking in October, possibly because I was at home two weekends and running around like crazy the rest of the month. However, at the end of the month I had several baking opportunities, which made me happy. :)

The first opportunity was our monthly birthday party at work. Each month we celebrate everyone that has a birthday with one party.. We barely fit it in this month with craziness at the end of the month, but we did squeak it in. I try to ask our birthday honorees what they want each month since there is no point in me making something that they won't even like.

This month's contribution came from one of our best student workers. We had been talking about pumpkin custard from Rusty's and she said she had never had pumpkin pie before. She is from an Asian-American family, so even though they have turkey at Thanksgiving, most of the rest of the food is traditional Asian dishes. When I asked her what she wanted for her birthday item, she said pumpkin pie, so that's what I made.

After beginning the preparations for it, I realized that I had never actually made a pumpkin pie before, so I had a few worrisome moments while getting everything together, but it all turned out well in the end. The only flaw was the crust. I used a fancy pie shield to protect the crust from burning, which worked fine until I went to remove it 15 minutes prior to the end of baking time and it took off about one-quarter of the crust edge. So, it didn't look quite like it should, but it still tasted good, and I ate the crustless pieces since I don't like crust anyway!

This recipe came straight from the Libby's pumpkin can. I had a tough time finding pumpkin at the store, so I hope there is not a shortage like there was last year

Libby's Famous Pumpkin Pie

Ingredients:
1/4 c. sugar
1/2 tsp. salt
1 tsp. cinnamon
1/2 tsp. ground ginger
1/4 tsp. ground cloves
2 large eggs
1 can pumpkin
1 can (12 oz.) evaporated milk
1 unbaked 9-inch pie shell (I used a refrigerated one)

Directions:
1. Mix sugar, salt, cinnamon, ginger, and cloves in small bowl. Beat eggs in large bowl. Stir in pumpkin and sugar spice mixture. Gradually stir in evaporated milk.
2. Pour into pie crust.
3. Bake in preheated 425 degree oven for 15 minutes. Reduce temperature to 350 degrees and bake 40 to 50 minutes or until toothpick inserted in center comes out clean. Top will begin to crack a little when close to done. Cool on wire rack for 2 hours. Serve immediately after cooled or refrigerate.